Showing posts with label mod podge. Show all posts

25 July 2011

Trying to catch up with my art journal challenge - Random

Random 
As well as not blogging I had stopped crafting so last week I decided to get work catching up on the prompts from UK Stampers. I have missed 8 prompts but managed three so far and I am planning a day of craftiness tomorrow even if the sun is shining again. Five Random facts about me include the facts I love live rock music, colour, am unitidy, love the Wire and one you may not know...since my hip replacement 18 months ago I have grown two centimetres. Unlike others who may shrink in later life I have started growing in my 40's.
This one did not turn out how I imagined as I was using random scraps of paper left over from an ATC Swap and thought gluing them on with Mod Podge was a good idea. If you have ever tried to stamp onto a shiny slippy surface you will understand my problem. I like the crinkly effect on the page but the stamps and paint did not take too well but that is what I enjoy about this process.


3 May 2011

Playing with backgrounds

I had a little time so decided to experiment with some backgrounds using some of that leftover glitter and mod podge and an acetate sheet. The photo above shows the acetate after I had used it to print some backgrounds.
I had mixed some modge podge, ink and glitter in a round lid and then stamped the lid onto the actetate.
I then sprayed it with dylusion inks and each time took a print of the page to create a background.

12 January 2011

Art Journal, Handmade Background Paper, Canabalising old sketch pads

Homemade background paper for journal with a little bit more paint and ink
Acrylic and oil pastel experiments

Quick colour sketch at Glen Brittle, Skye

I think I was considering turning it into some kind of stained glass - always make notes beside sketches

More attempts at learning to draw

Pulling the sketch pad apart - i like this shape

Starting point for my 2011 Art Journal
I was feeling a little better yesterday and decided I was going to start work on creating an Art Journal for this year - nothing like musing about art journals and thinking you can give it a go. In between bouts of hallucinations last week I had been surfing some of my favourite art journal sites (will put up links to these on another post) and decided I had to give it a go.  I came across Julie Kirk's Notes on Paper and found out about a journal challenge on UKStampers and this seemed like perfect serendipity. As a total art journal novice I like the fact that prompts are given each week to get you going and I finally know what I can do with all these background papers and paper experiments I have created and not used.
As usual I launched into the thing without reading the small print and began to take apart various old sketch pads to use as the paper and recycle some paper pad backs - hence the pics at start of this blog which I found in pads. I really need to make notes on what I am thinking when doing this and I really need to start drawing again every day as I've forgotten how.
Handmade paper background
I did this a couple of months ago when I felt like experimenting. I took plain white card and painted over it with watery blue acrylics and then sprayed pva glue over the paint. Finally I took some metallic spritz and sprayed it everywhere. I also did this in an orange colour way. I liked t he effect but like many of my experiments wasn't sure what to do with it.
The challenge is ideal as it asks you to use a handmade background paper, photo and 3 goals.
I decided to tear up the paper along some of the glue lines to see what shapes I could get.
I couldn't stand the look of the bare paper underneath so took Shabby Shutters and Broken China Distress inks to page. I haven't got an ink tool applicator thingy yet but it is on my list as all the demos with distress ink use this - at present I use paper towels and fingers... Still seemed lacking so adding versamark chalk turquoise gem ink. How to stick down? Mod Podge of course but am not sure if this is the right way to go - will need to ask around the forums.
Liberal application of mod podge
Once this was dry I took out some Blonde Moments suet pudding paint and began to highlight different shapes with different size dots. I wrote in Goals at what looks like the top of a hill/spike to me and the numbers 1 to 3.  I was then too tired to do much else.
I took a photo of me in Paris and decided if I cut it out and gave it a border it could become an arrow pointing to my goals - the border and arrow base were doodled with a sharpie and I added more paint and chalk ink.
I was going to do more today but having just blogged about the stuff so far am so tired. This flu has a lot to answer for... Progress so far below.


27 November 2010

Mixed media collages using lots of Tim Holtz products


I have been experimenting with various techniques to make mixed media collages and would like to frame some as presents. I liked the idea of each one embodying a saying and have been trawling the internet for interesting sayings. The first one was inspired by Dyan Reavley's quote of the week.

I began by using distress inks on a plain piece of cream card 7 x 7 inch, then I stamped text on using a Tim Holtz stamp from the Shabby French collection. I then took a smaller piece of scrapping paper that was grey with black flowers and changed its colour using distress inks. I then printed out a photo onto plain paper and stamped on it then mod podged over the top of it and transferred it to another sheet of card - giving the blue look. I flocked and glittered and light bulb shape. Printed out the quote and layered it onto other paper before adding to the collage. Finally I added some glitter buttons.


My next collage is based on the saying "A smile is a curve that sets everything straight" - Sister Busche
This time I distressed the cardstock and then cut out letters from Tim Holtz seasonal papers - 4th July as never likely to scrap that day here in Scotland. I place 4 smile phrases around the pages and then added to torn out and inked dictionary definitions of a smile. I then stamped the bird and text from the Shabby French collection. I cut letters from a magazine for the saying and inked these. Once stuck down I added crackle glaze to them.


13 November 2010

Mod Podge transfers, Tim Holtz stamps, inks and so much paper messy fun

Distress inks, stamps, embossing and crackle

distress inks, stamps
I printed out a detailed section of  b/w photo of Eiffel Tower and then covered surface of card with modpodge stuck and rubbed paper face down and then peeled off - blue colour as printed in greyscale

I love the aged and faded and frankly haphazard nature of this technique and will be tying out lots more. My fingers were stained with ink and I could not get it out for days but it was fun.
Crumpled card stock, distress inks, then ironed it. Stamped bird and text

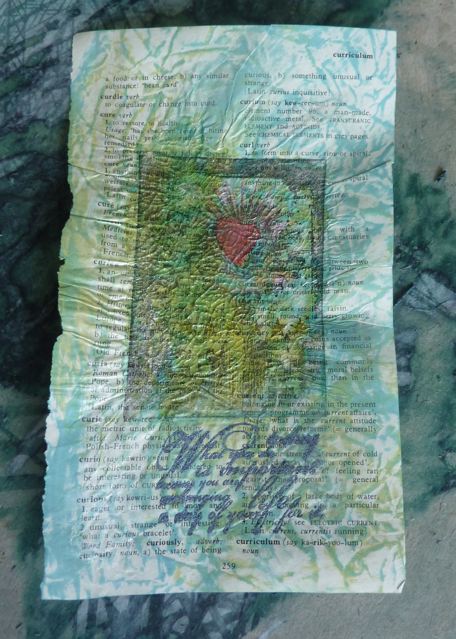
Distress inks on dictionary page, stamped and embossed text, stamped image, coloured with watercolour pro markers and added crackle paint
I treated myself to a few purchases this week - I justified it to myself as preparation for making Christmas presents. When the Mod Podge, Distress Inks, Crackle, Distress Items and Cinch arrived I just  had to play. I had no fixed idea in my mind so just created lots of little bits and pieces that I can may be use later.
I have a stock of old dictionaries with very thin paper and have been playing with these by crumpling then distressing then stamping (ironing too) and adding a bit of crackle paint.
I also bought the time masks - this is on recycled paper with pearl paint dabber

This paper already had paint on it from previous project and some bits of paper so tried pearl paint again and inks